
Registration & Verification
Which ID Documents Does Binance Accept — and Why Yours Was Rejected
A practical checklist for choosing the right identity document, photographing it so automated checks pass, and reading the real reason behind a rejection.
Most rejections are about the photo, not about you
When a document submission comes back rejected, the instinct is to assume something is wrong with your identity or your account. In the large majority of cases it is far more mundane: the image did not give the automated checks enough to work with, or the document you chose does not match the category you selected.
That distinction matters, because the two problems have completely different fixes. A capture problem is solved in two minutes with better light. A document-eligibility problem is not solved by re-uploading the same file ten times — and repeated resubmissions can push you back down the review queue.
Choose the document type before you choose the file
Binance asks you to pick a document category first, then upload. The check that runs afterwards expects the file to match that category. A national ID card uploaded under "passport", or a residence permit uploaded under "driver's licence", tends to fail immediately regardless of image quality.
Which document types are offered depends on your country of residence. The list you see in your own account is the authoritative one — it is generated for your region, and it changes. Do not work from a list you found on a forum.
Two eligibility rules apply almost everywhere and are worth checking before you upload anything:
- The document must be current. Expired documents are rejected on the expiry date alone, no matter how good the photo is. Check the date before you spend time on the capture.
- The document must be yours. Using a relative's or a friend's document is not a shortcut that occasionally works — it is a terms violation that can permanently cost the account, and it will surface later when a face check compares you to the photo.
Photograph the physical document
This is where most avoidable failures happen.
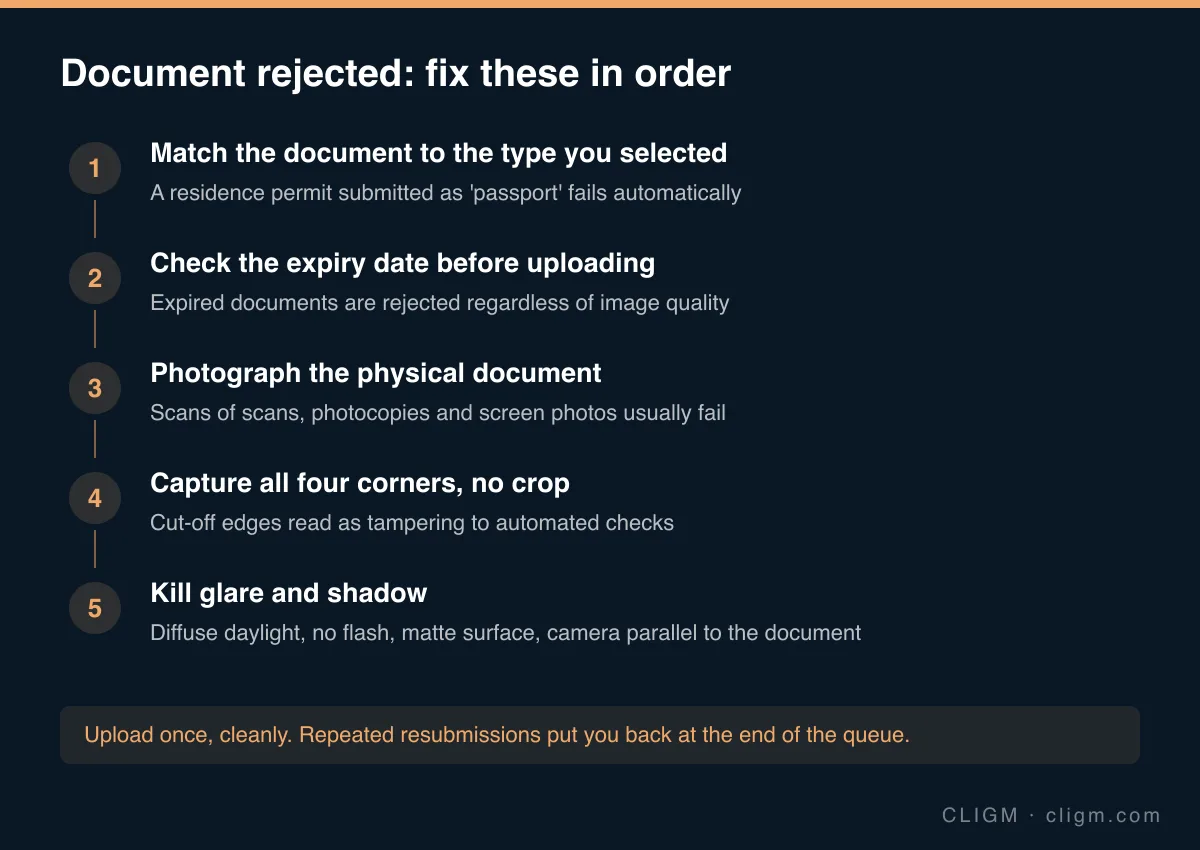
The single most common mistake is uploading a photo of a screen or a photocopy. Automated document checks look for the physical security features of the real card or booklet — the print texture, the holographic elements, the way light falls across the surface. A screenshot of a PDF has none of that, and it looks to the system exactly like the sort of file someone would submit if they were trying to use a document that is not theirs.
The practical setup that works:
- Light: diffuse daylight, near a window but not in direct sun. No camera flash — flash creates a bright blowout across the exact area where the holographic features sit.
- Surface: a matte, plain, contrasting surface. A dark document on a dark desk gives the edge-detection nothing to find.
- Angle: hold the camera parallel to the document, not tilted. A perspective-distorted rectangle can fail the geometry check.
- Framing: all four corners inside the frame with a small margin. Do not crop tight to the card's edge — a cut-off corner reads as a possible alteration.
- Focus: tap to focus and confirm the small print is legible before you upload. If you cannot read the document number on your own screen, neither can the check.
Reading the rejection message
The status message you get back is usually generic, but the surrounding context is not. Before resubmitting, check three places: the verification page itself, your in-app message centre, and the email address on the account. A rejection that came with a specific request — a second document, a clearer image of one particular side, an address proof — is a very different situation from a bare "not accepted".
If a specific document was requested, supplying anything else will simply restart the loop. If nothing specific was requested, treat it as a capture problem first and fix the photo before you consider anything else.
When it is genuinely not the photo
A few rejection causes have nothing to do with the image, and no amount of re-shooting will clear them:
- The details you typed into your account profile do not match what is printed on the document. This is common enough that it has its own diagnosis — name order, middle names and transliterations are the usual culprits.
- The document type is not accepted for your region, even though it is a perfectly valid document.
- The account already has a completed verification under a different identity.
- Your case has been routed to enhanced review, and the "rejection" is actually a request for additional documents.
Resubmit once, cleanly
The most useful habit is also the least intuitive: slow down. Get the document, the light and the framing right, then submit a single clean attempt and let it run. Rapid repeat submissions are the most reliable way to turn a two-hour automated approval into a multi-day manual review.
If the submission is accepted but the status then sits still, that is a different problem with a different answer — see what "under review" actually means and how long verification normally takes.
And if you are setting up the account from scratch, doing the profile details correctly the first time removes most of this friction — that is covered in creating the account safely.
CLIGM is an independent guide and is not affiliated with Binance. Verification requirements, accepted documents and available products differ by region and change over time — always confirm the current rules inside your own account or in official Binance support material. Last reviewed: August 2026.